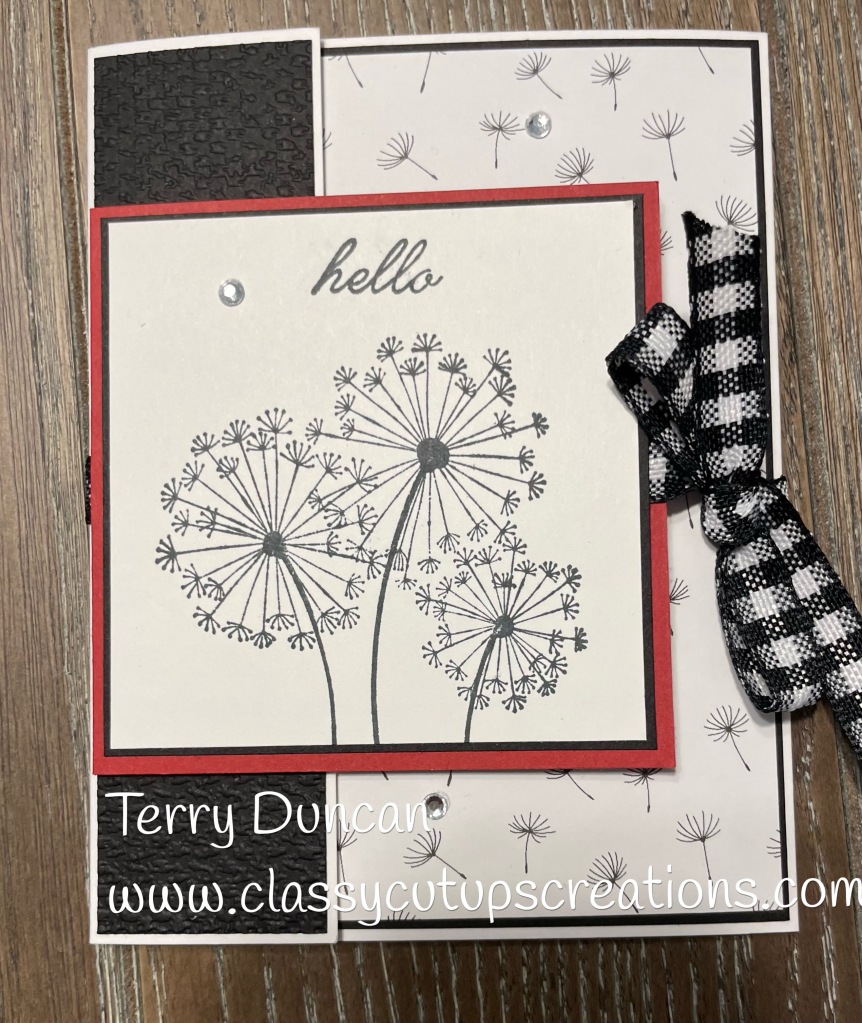
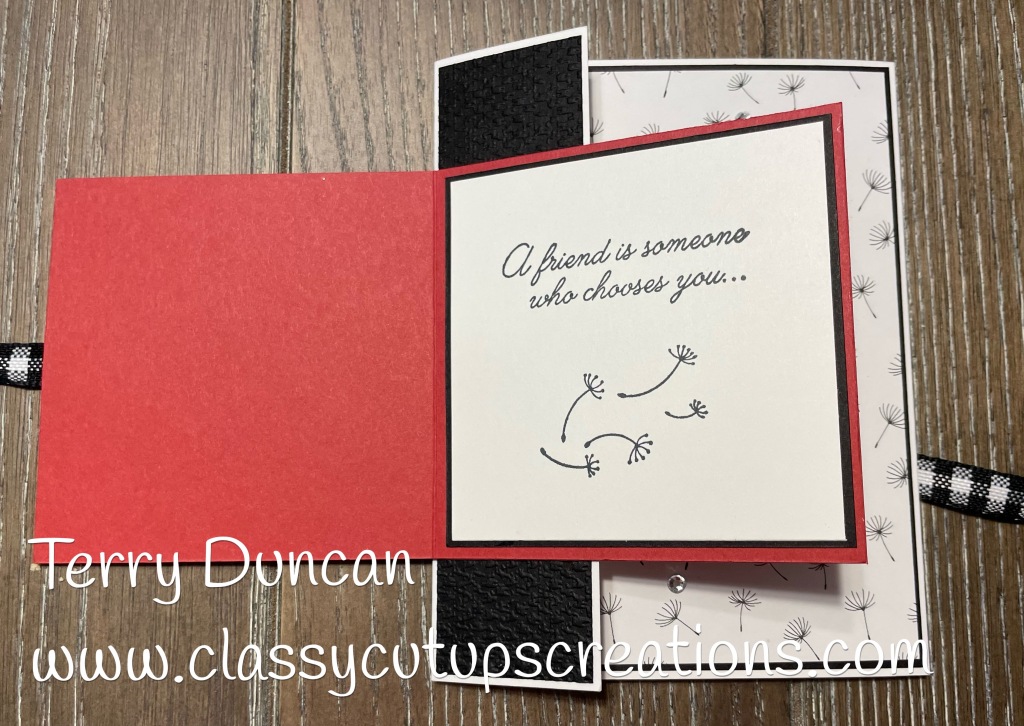
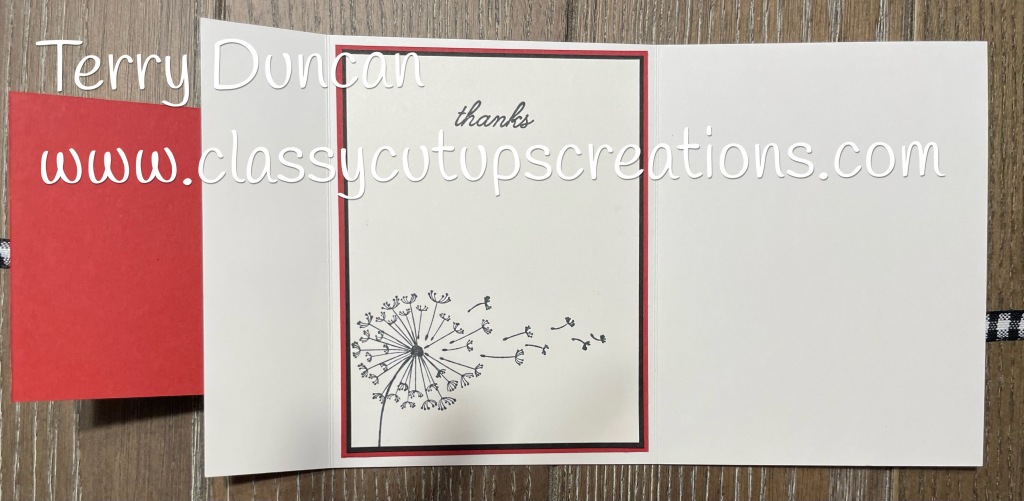
I have another fancy fold card to share with you today. This one was fun to make and I plan on making more of them! It looks more difficult than it is. It’s like making a normal size card and then making a smaller card to go on top of it.
Let me know if you would like a tutorial for this card. Just post a comment below!
Let me know if you have any questions or comments and I’ll will answer soon!
Yes, it’s been a rough 3-1/2 months! As some of you may know, I broke my leg in 3 places and had to have surgery – The doctor put a metal plate and screws into my ankle. OUCH! It still hurts a lot and I walk with a limp, but at least I’m walking now. Enough about me!
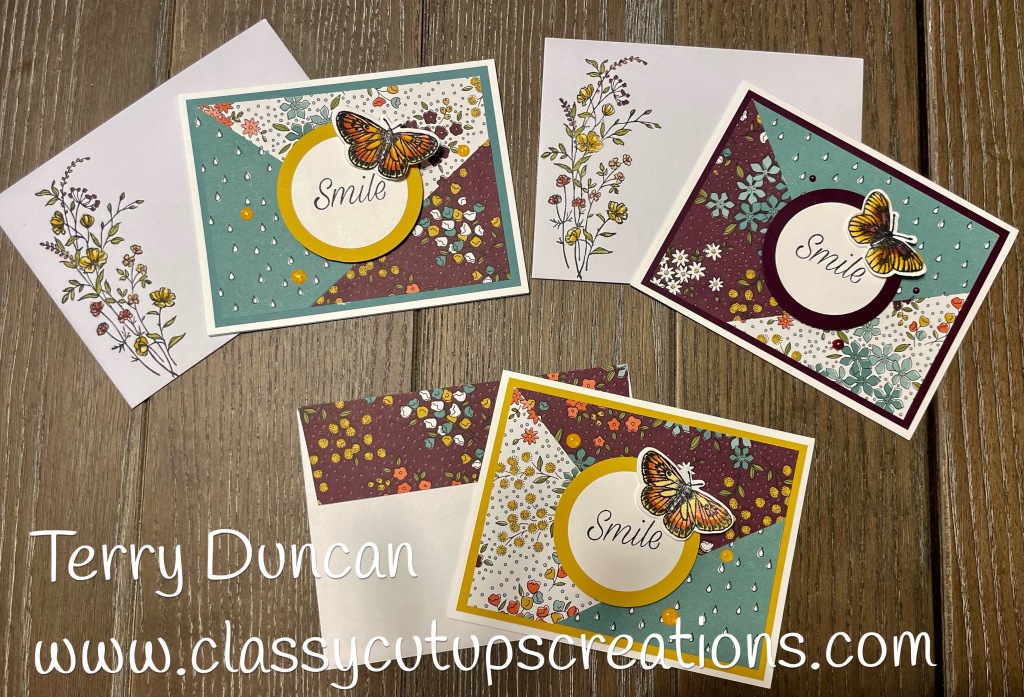
I made these cards last week using a tutorial from Patty Bennet. I thought it would be a great way to show off Stampin’ Up! new Designer Series Paper. Usually when I’m trying something new, I use retired designer paper that I still have on my shelves. I wasn’t planning on posting these particular cards, but I’ve had so many comments and questions about them on Facebook. So, I thought I would tell how they’re made here.
The best way to match the 3 prints you are going to use is to use papers from one of Stampin’ Up’s Designer Series Paper packs! The designer papers included in each package are color-coordinated and you can even find out the matching colors of cardstock by looking on the back of the pack. I chose 3 different designs from the retired Wildflower Field.
First, cut 3 pieces of Basic White Cardstock to 5-1/2″ x 8-1/2″, score and fold at 4-1/4″ to make the card bases. We are going to make the 3 cards at one time.
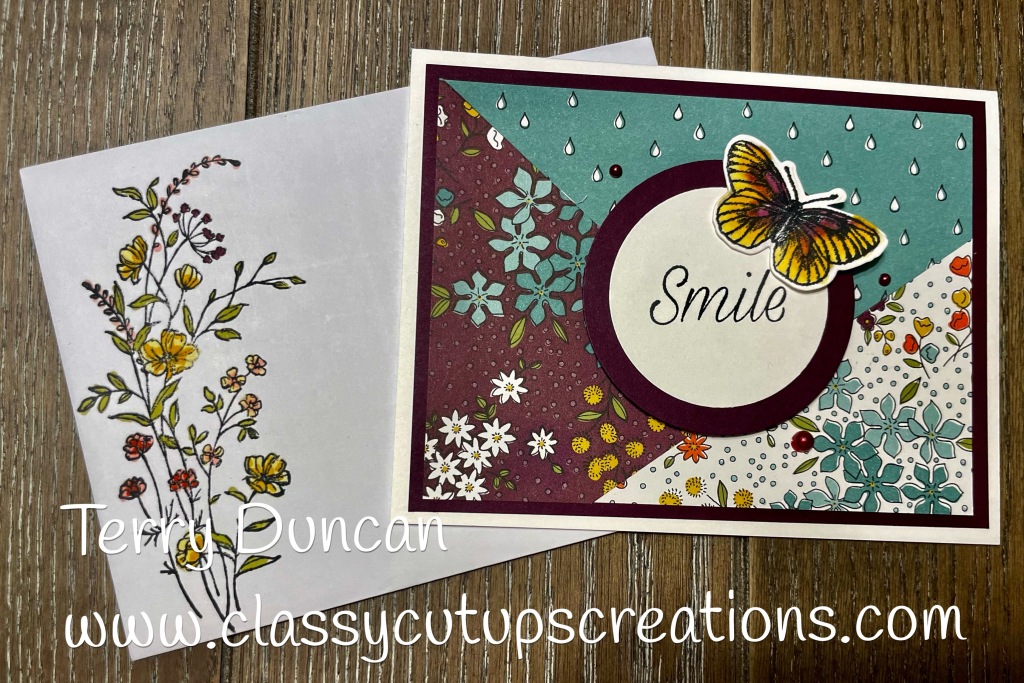
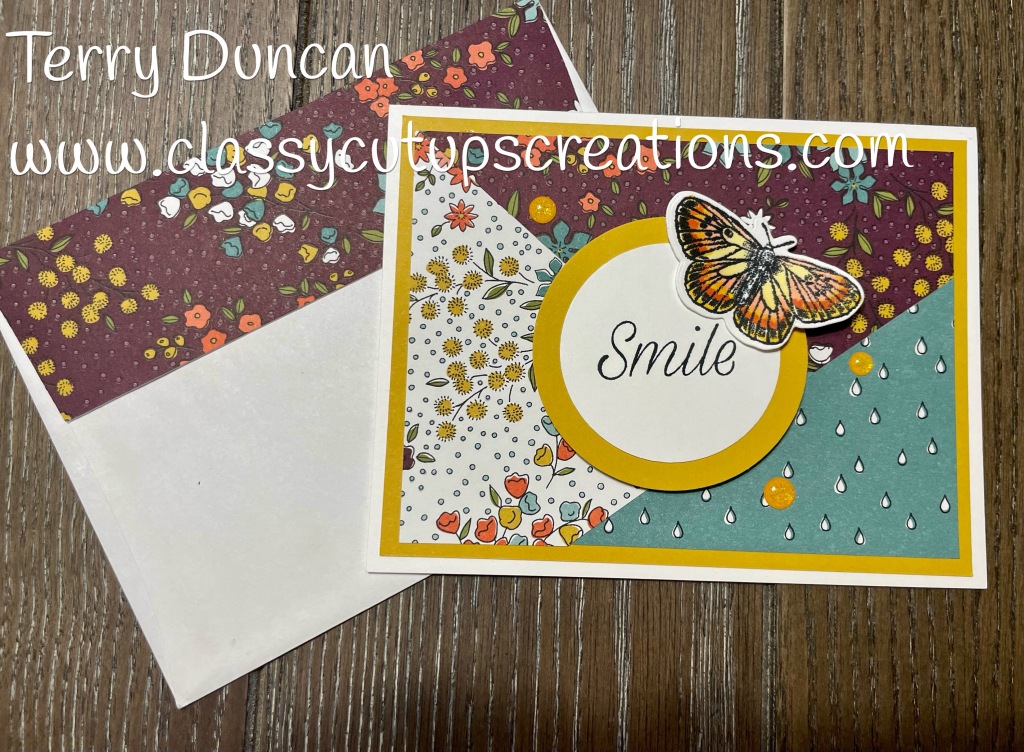
Next, cut 3 pieces of coordinating cardstock to match the designer paper you are using to 4-1/8″ x 5-3/8″. These will be the layers on which you will adhere the cut designer paper. As you can see, I used 3 different colors of cardstock, but you certainly don’t have to – You can use the same color for all 3 cards.
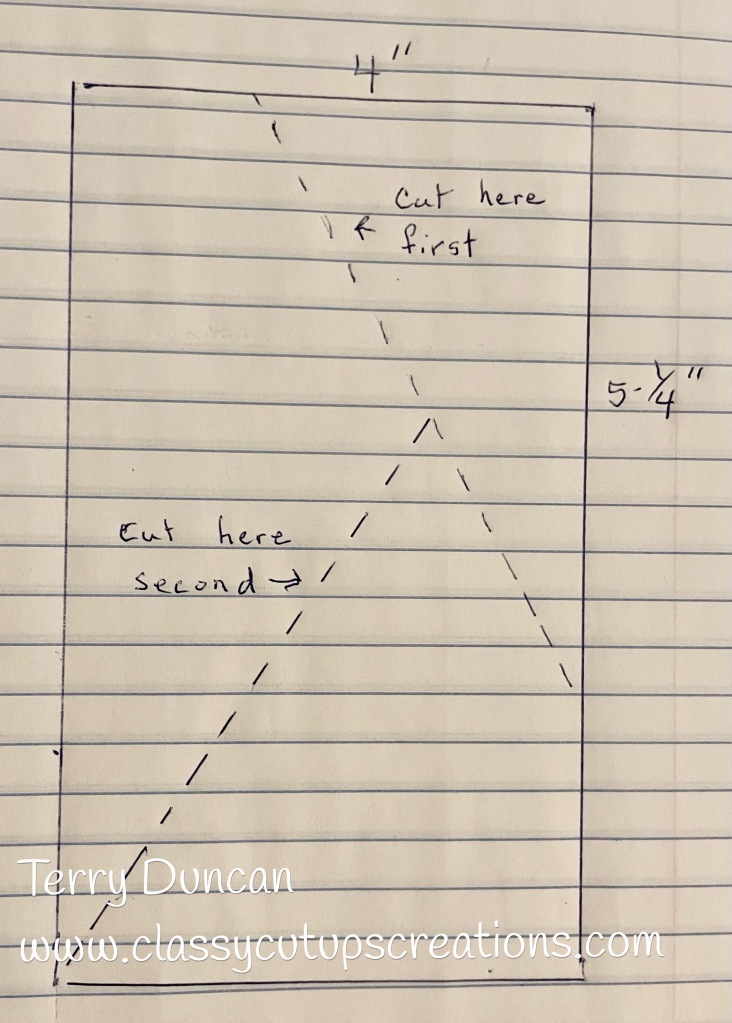
Now cut the 3 pieces of designer paper to 4″ x 5-1/4″. You are going to do this by putting the 3 pieces of designer paper on top of one another and placing them on your paper trimmer. This is the secret to making the cards! They’re are no measurements as to where you cut your designer series paper stack. You can cut where you want to as long as you cut all the panels at the same time. Here is a rough drawing of how I cut mine.
The next thing to do is to take the 3 top-right pieces and lay them out on the table in 3 places. Then you’re going to “shuffle” the 3 bottom-right pieces and lay them in place next to the 3 you cut first so that they line up like the diagram. Next, take the remaining 3 cut pieces and lay them down with the other 2 so that you have 3 different layouts.
After you have them on the table like they should be, go ahead and take 1 card base and 1 piece of cardstock and glue them together. Next, take 1 of your layouts and glue it to the card base and panel making sure to adhere the pieces of designer paper right next to the other pieces so there is no space in between them, as shown below. It doesn’t matter whether you make your card in a portrait or a landscape direction.
You can then decorate it the way you want. I used a simple greeting, stamped it in black ink and punched it out with my circle punch. I punched out a piece of the colored cardstock with a slightly larger circle punch and adhered them together and then to the card front with Stampin’ Dimensionals. The butterfly is from the Butterfly Brilliance Stamp Set. I stamped in in Momento Black Ink and colored it with my Stampin’ Blends. I used the coordinating die to cut it out and placed it on the circle.
I don’t know about you, but I love to decorate my envelopes to match my cards. I used the Dainty Delight Stamp Set for the front of the envelopes and designer series paper to the flaps on the back.
I hope you like the cards and give it a try! It’s a fun technique and you could even cut the designer series paper in 4, 5, 6 pieces, etc.
Let me know if you have any questions or comments and I’ll will answer soon!