Hi Friends,
Yesterday I shared a simple card made from a card sketch and I had a few questions from some of you. I thought it would be a good idea to show you more about card sketches and how to use them to get started making your own pretty cards.
Whether you are new to card making or not, we all have moments when we can’t come up with with a layout or card design for what we want. I used to struggle coming up with card designs and wondered where to start. That all changed when I began entering different card challenges based on a design or color combination. Once I started making my cards following those sketches, things got so much easier. I began researching card sketches I liked and wanted to try and it made my card making a whole lot more enjoyable! Now there are so many card sketches you can find to use in card making magazines, the internet, Pinterest and blog posts. It doesn’t matter if you are new to card making or a veteran, we all have those moments when we are stuck and need some help.
Basically, card sketches are “rough drafts” for the layout of your card. They usually consist of card bases, layers and embellishments. Some provide measurements, while others don’t, but you can pretty much guess at the them by looking at the sketch and a card base. I like to cut my pieces out first and then experiment with them on my card front before gluing them down.
Below, is the card sketch that I used for this post. There are basic elements to all card sketches: card base, layers, focal point, greeting and measurements. I love that this design has basic rectangles, but more than one and it’s just a little more involved than yesterday’s sketch. Most sketches are adaptable to just about any occasion. Don’t forget, the designs can be turned from portrait to landscape and vice versa!

Here is the card I made using the card sketch. You don’t have to use as many background mats as I did, but I think they make the cards so much prettier!
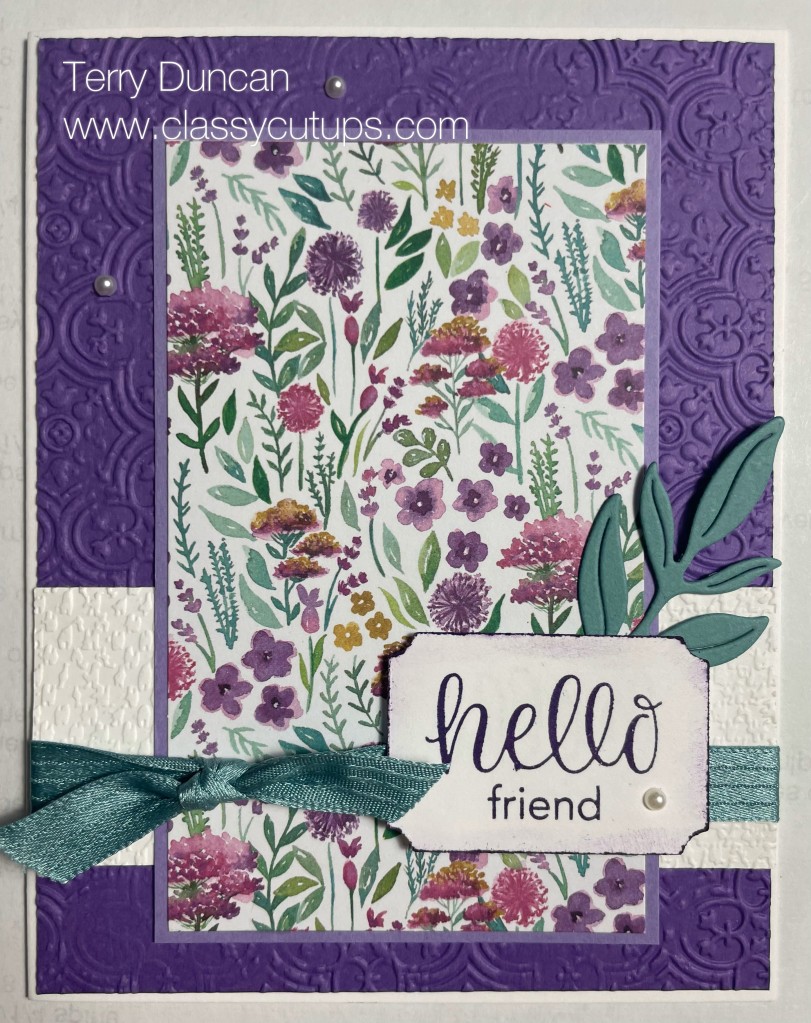
I used a Basic White Card Base with a layer of Gorgeous Grape Card Stock, which was embossed with the Stampin’ Up! Distressed Tile Embossing Folder.
I adhered designer series paper from the Lovely Lavender Paper Pumpkin Kit onto a piece of Highland Heather Card Stock and glued an embossed piece of Basic White Card Stock (which was embossed with the Stampin’ Up! Tasteful Textile folder) to the back of it.
I wrapped a piece of Lost Lagoon Ribbon around this panel before adhering it to the card base. Once it was adhered, I tied a knot around it.
The lost Lagoon leaves were cut out using the leaves die that coordinates with the Paper Pumpkin Kit. They were glued to the card front.
The greeting was stamped in Gorgeous Grape Ink. It came from the All the Best Paper Pumpkin Kit we received last month. The Basic Pearls were added last.
*Don’t forget to use the monthly Hostess Code when you place your online order between $40.00 and $150.00, before tax and shipping to get your FREE gift from me! If you’re order is over $150.00, before taxes and shipping, don’t use the Hostess Code because you will receive Hostess Dollars to spend, as well as the FREE gift from me when you place your order! (Just let me know your order was over $150.00 before taxes and shipping.) You add the Hostess Code to your order right before checking out. Please let me know if you have any questions or problems. This month’s FREE gift is your choice of a pair of Stampin’ Blends or an embossing folder of your choice from the new 2023 – 2024 Stampin’ Up! Annual Catalog or the 2024 Mini Catalog! This is in addition to your FREE Sale-A-Bration choices with your qualifying order.
This month’s Hostess Code is JDDWXJN7
If you have any questions about this card, please let me know.
Thanks for stopping by and have a crafty day!
Terry
Blog: http://www.classycutups.com
On-line Store: https://teresaduncan.stampinup.net/
Email: terry.duncan088@gmail.com
Phone: (727) 225-6006